We want to share some tools and tips and tricks on how to set up a pop-up research lab from our previous testing projects, such as JD.com Full Usability Scan, Tencent ABCmouse, etc. There are many tools out there. But not all of them are suitable for field testing. Here we want to introduce what works best for us specifically when research is conducted on the move.
3 essential components
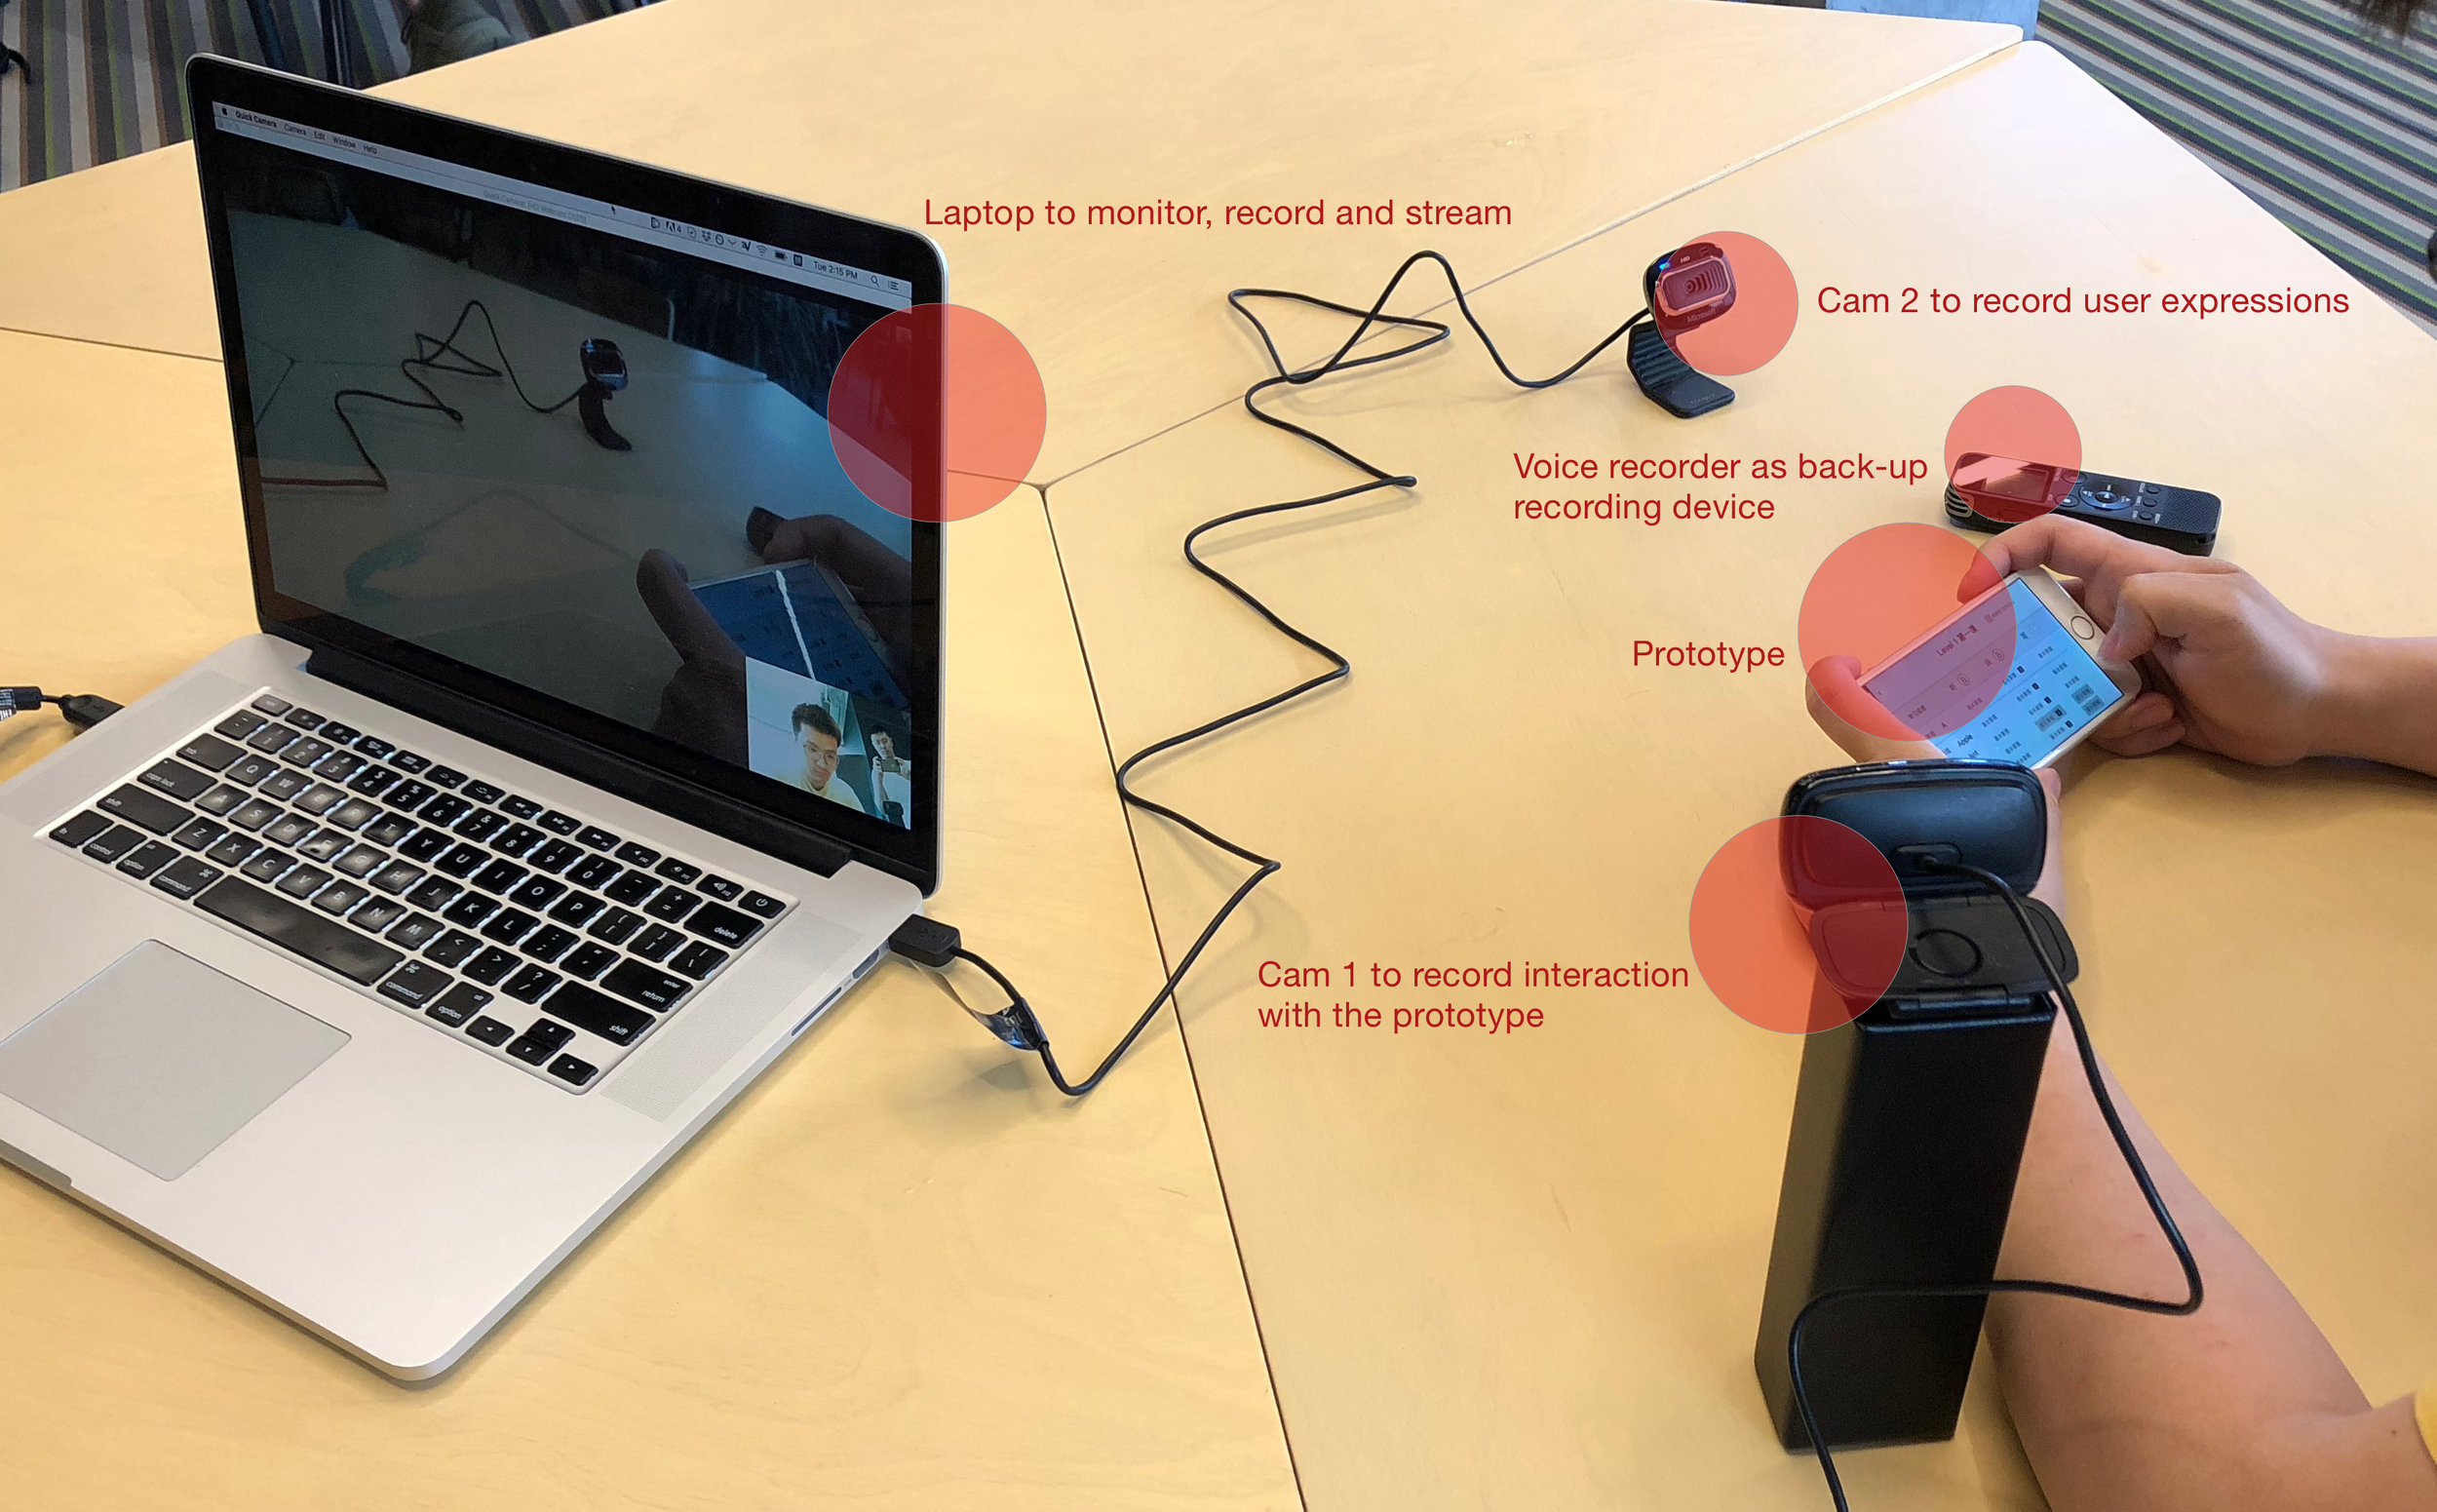
To set up a pop-up research lab, there are three essential components: recording webcams, a screen recording tool and a streaming tool for observing remotely.
1. Recording cameras
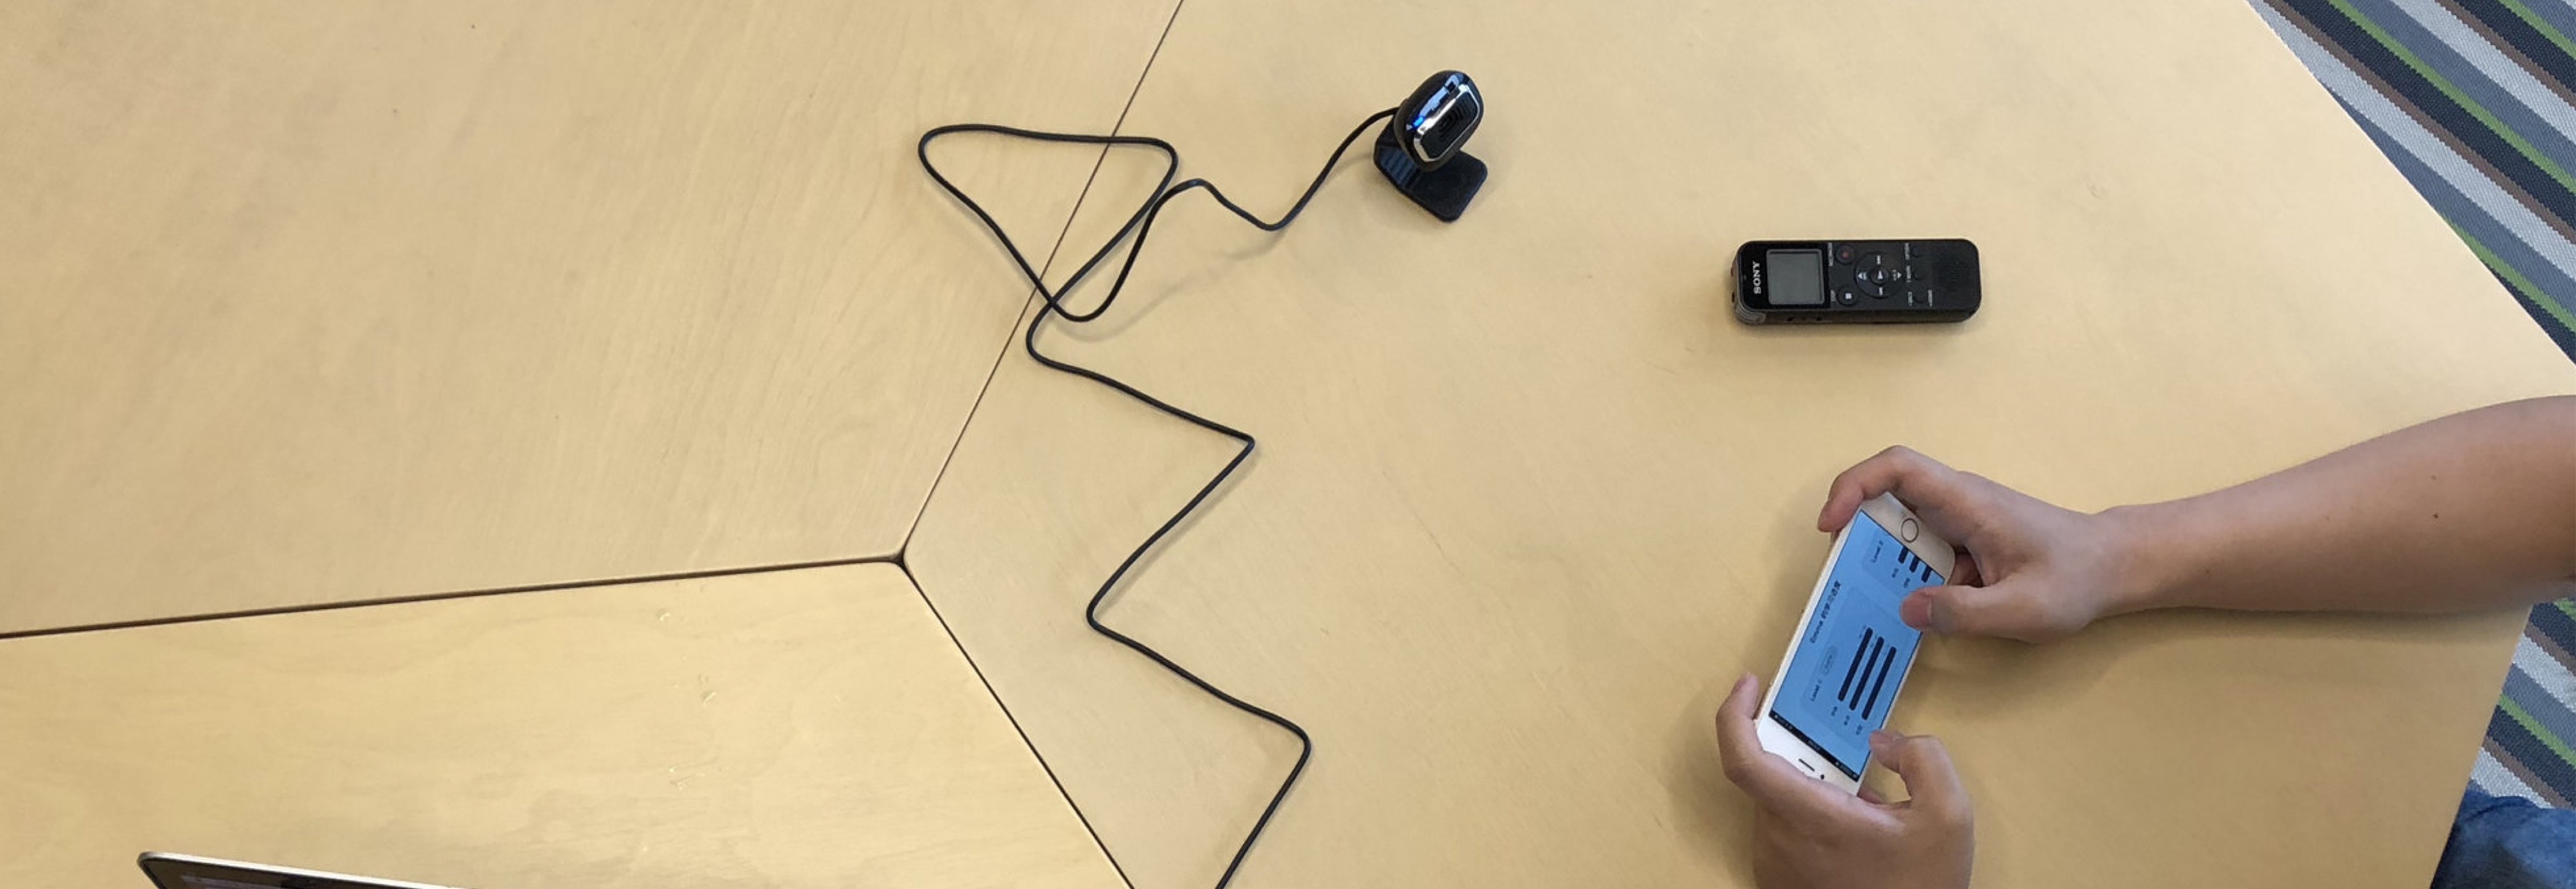
You need two cameras — one to capture users’ expressions; the other to capture screens and finger movement.
Why do we prefer to use webcams instead of testing apps?
Although many apps now can indicate where users tap on the screen, they still do not show swiping gestures. When conducting UX testings, it is essential for us to know how users engage with their phone in all aspects.
A webcam captures all gestures and tappings. Users can hold the phone naturally. And there are no barriers between phone and user.
Disadvantage:
- The angle of screen is tilt, however doesn’t influence viewing
- People may move their hands out of the camera’s field; however, a reminder usually solves the problem
- Some short-sighted user may hold the phone very close to their eyes. The camera may not capture everything.
Other options and why I didn’t use them:
- Reflector. Airserver. UX Recorder — Tools to mirror interface on macs using Airplay. They do not support showing finger movements. UX Recorder only works for mobile browser.
- Mr. Tappy — A kit to attach webcam on mobile devices. It’s heavy and clumsy to hold. The users have to overcome the feeling of an attached camera.
- Mounted cameras — These may be the best solution if you have the budget and able to carry them. People can move their hands freely. For offsite testing, my simplified solution worked fine for me.
2. Screen capturing tools
Two apps (DwayneCam, Qcamera) for viewing the webcams on mac. Quicktime for recording the screen.
DwayneCam, Qcamera These two apps are simple. And they are free. You can enlarge the viewing windows and hide borders – which makes a perfect screen for monitoring and recording. The Logitech app which comes with Logitech webcams does not support enlarging windows.
Or you can use either app and use the trick below to enble the same app in two windows
1. Open Terminal in OS
2. Type “DwayneCam”
Quicktime
Quicktime is used to recording screens, in this case, recording two camera views. Nothing special. It just works.
What doesn't work for us?
Screenflow and Silverback. Screenflow takes too much space while recording. It takes up to 10g to record a one-hour interview. Silverback is not stable. We had experienced that the software fails to save the videos when the interview exceeds one hour. So we stopped using it. However Quicktime never fails us.
3. Streaming tools
AirPlay and Gotomeeting.com for streaming test sessions to remote observers. If your team stays in another room, it is easy to set up Airplay in a Wi-Fi environment. If your team is located in another office, Gotomeeting is one of the good solutions. The connection is usually stable. The other options are Skype, Cisco Webex etc.
4. Which webcam is the best option?
Choose a cam that allows adjustment of focus since the screen will be pretty close to the camera. Choose a cam that supports a mini tripod.
If you can’t find any cam with adjustment of focus (like me), you can DIY (that’s right).
We own a Logitech HD C270 http://amzn.com/B004FHO5Y6. Although after purchase, we found that it supported neither a tripod nor focus adjustment.
Here is a Youtube video teaching how to adjust the focus manually. http://youtu.be/v-gYgBeiOVI
5. Our toolbox
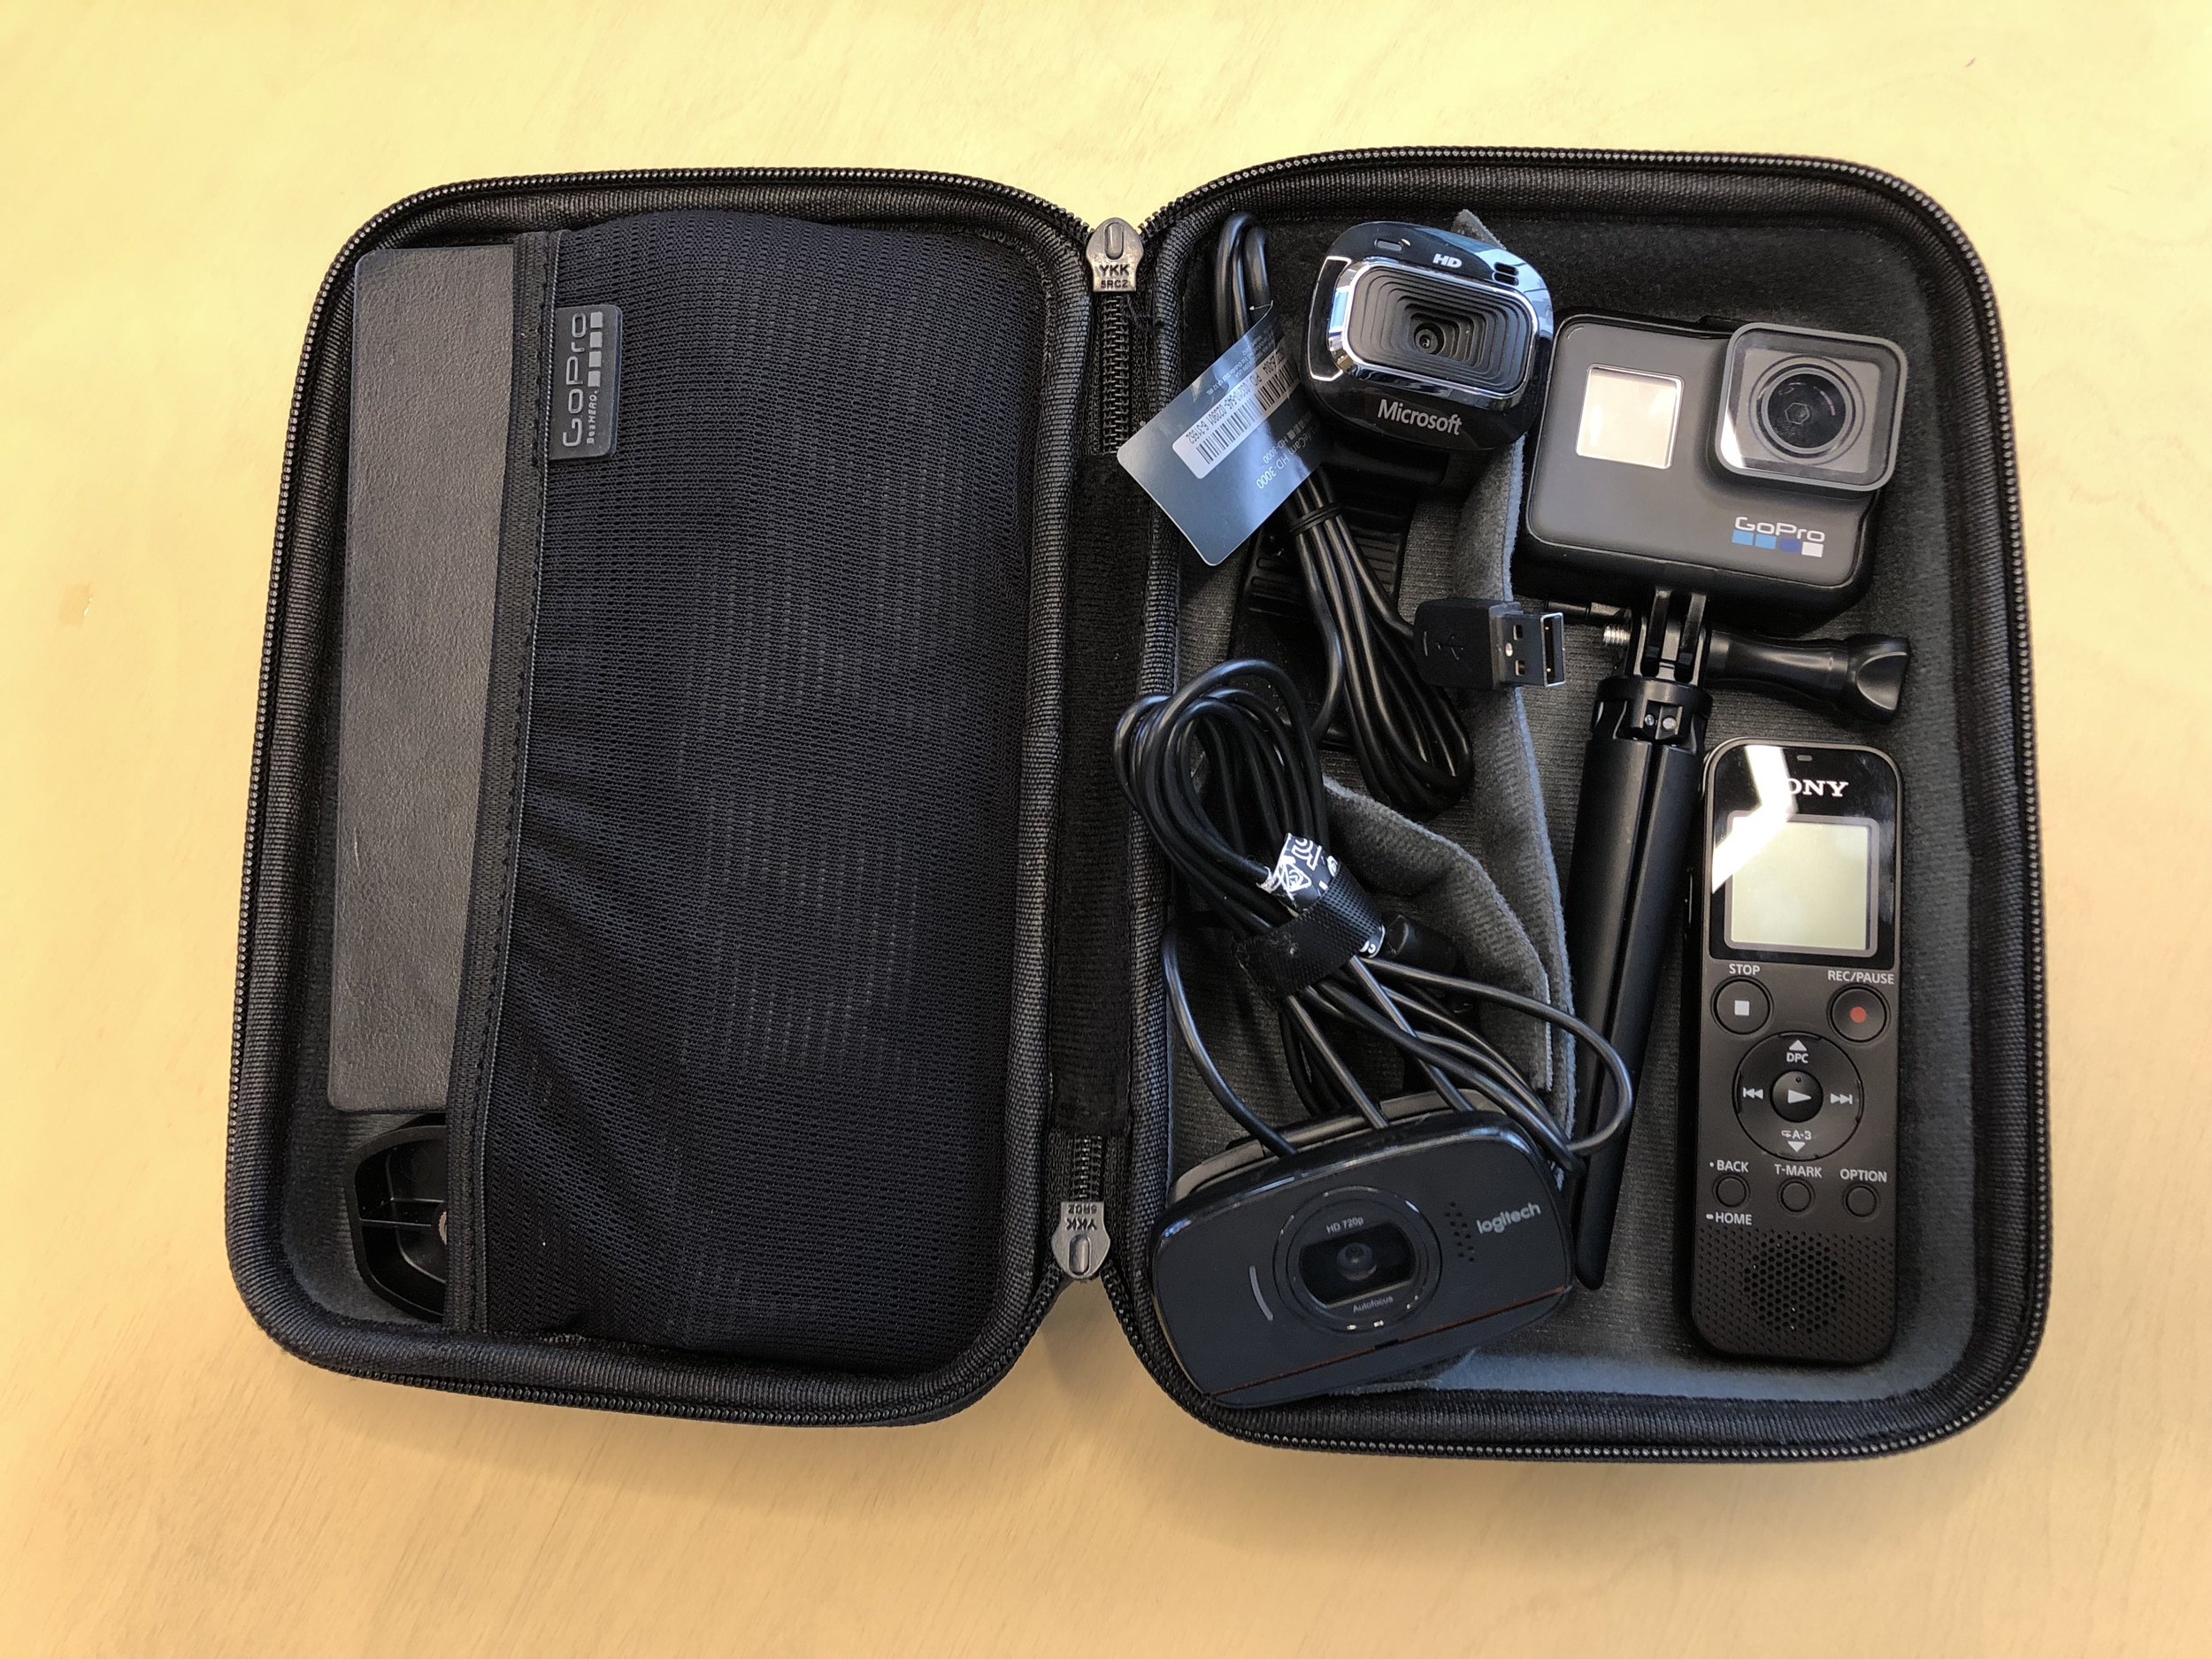
We chose a GoPro toolbox. It’s light and a perfect size to hold all essential equipment. Two webcams, one GoPro, one tripod, one voice recorder, batteries, chargers and connections all fit in this box. It’s the right size for your backpack.
Now you are ready to go!